
1. Introduction: Why Drawing Elephants is Fun for Kids
Drawing is a wonderful way for children to express themselves while developing important life skills. It can help children improve their fine motor skills, concentration, and creativity—all while having fun. For parents and teachers, introducing easy drawing for kids can provide an enjoyable way to engage kids and foster a love for art.
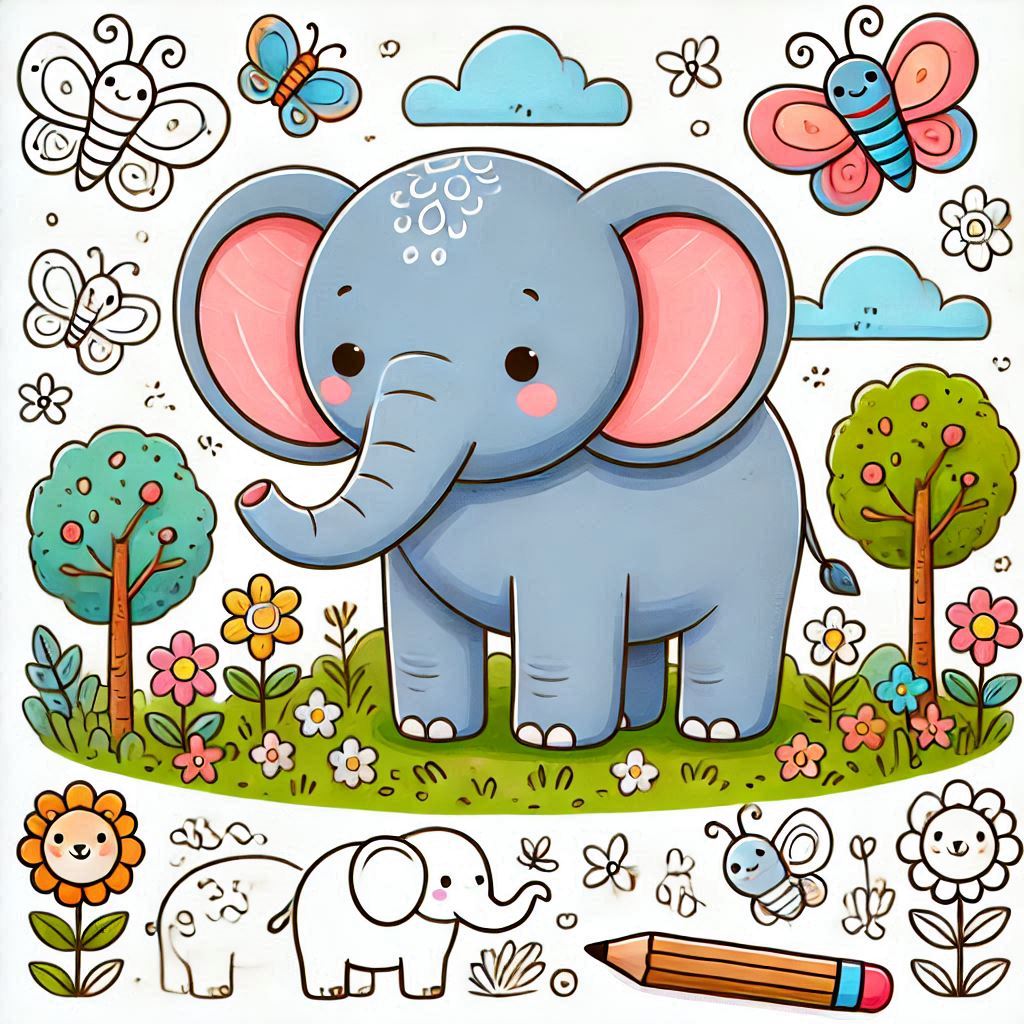
In this guide, we’ll walk you through an easy step-by-step elephant drawing that’s simple for young artists to follow. Whether your child is just starting their artistic journey or already has some experience, they will love bringing an elephant to life with just a few basic steps. So, let’s get started on this fun and easy elephant drawing for kids!
2. Benefits of Drawing for Kids
Drawing isn’t just about creating a picture—it’s an essential tool for your child’s development. Here are some key benefits of encouraging drawing for kids:
Enhances Fine Motor Skills
Drawing helps children develop their fine motor skills. Gripping a pencil, controlling the lines, and adding details all require hand-eye coordination, which is vital for other tasks like writing, typing, and tying shoelaces.
Fosters Creativity and Imagination
When children draw, they get the chance to explore their creativity and express themselves. Drawing an elephant allows children to use their imagination, whether they color it realistically or add their own unique artistic spin.
Promotes Focus and Patience
Drawing is an activity that requires attention and patience. From following steps to filling in details, kids will practice focus, which can enhance their ability to concentrate in other areas, such as schoolwork and reading.
Builds Problem-Solving Skills
Through drawing, children learn to think critically. For example, when drawing an elephant, they may need to figure out how to represent the trunk or how to proportion the legs. This problem-solving aspect makes drawing fun and educational.
Incorporating drawing for kids into their routine brings developmental benefits while also providing an enjoyable way for them to spend their time.
3. Materials Needed for Elephant Drawing

Before we dive into the step-by-step elephant drawing, make sure you have the right materials ready. The beauty of this drawing is that you don’t need expensive supplies—just the basics!
Essential Materials
- Drawing Paper: Any standard paper will work fine for your child’s artwork.
- Pencil: A simple pencil is all you need to sketch the shapes and lines.
- Eraser: Use an eraser to fix any mistakes or refine the drawing.
- Crayons or Colored Pencils: These are perfect for adding color to your elephant once the drawing is complete.
- Markers: If you prefer bold, vibrant lines for details, markers can be used, but this is optional.
With these simple materials, kids can create a wonderful elephant drawing that they’ll be proud of. The key is to keep it accessible and fun.
4. Step 1: Drawing the Elephant’s Head
Let’s begin with the first step—drawing the elephant’s head! This is the foundation of the drawing, and we’ll keep it simple so that kids can easily follow along.
Instructions for Drawing the Head:
- Start with an Oval Shape: Draw a large oval in the center of the page. This will serve as the base of the elephant’s head. The size can be adjusted depending on the size of the elephant your child wants to draw.
- Shape the Trunk: At the bottom of the oval, extend a curved line that goes downward and then curves back up. This will form the elephant’s trunk. Don’t worry about perfection—just focus on the flow of the lines.
- Adding Texture: Draw a few lines along the trunk to give it texture, as if it’s wrinkled, to make it look more realistic.
This easy and simple method allows kids to create the foundational shapes of the elephant without getting overwhelmed by complex details.
5. Step 2: Drawing the Elephant’s Body
Next, let’s add the body of the elephant. This part of the drawing will give your child’s elephant a strong, stable look.
Instructions for Drawing the Body:
- Draw a Rectangle Shape: Under the head, draw a large rectangle. This will be the body of the elephant. The rectangle should be a bit wider than the head but still have a slight curve to its edges.
- Smooth the Rectangle: To avoid sharp edges, round the corners of the rectangle, giving the elephant’s body a more natural, organic shape.
- Add the Shape of the Belly: For a more realistic look, you can make the bottom of the rectangle curve slightly outward, creating the elephant’s belly.
These simple shapes give the elephant a stable and proportional appearance. The body is large but simple enough for kids to replicate.
6. Step 3: Adding the Elephant’s Trunk Details
Now that we’ve created the basic structure, it’s time to focus on adding details to the trunk. The trunk is one of the most iconic features of an elephant, so we want to make it stand out.
Instructions for Drawing the Trunk:
- Refine the Trunk’s Shape: Extend the trunk from the head, making it curve downward and then back up. This makes the trunk look like it’s reaching out in a natural, lifelike way.
- Add Wrinkles and Details: Elephants have textured trunks, so adding small curved lines along the length of the trunk can make it more realistic. This can be as simple or as detailed as your child likes.
Encourage kids to experiment with different curves and wrinkles, as this is where they can add their personal touch.
7. Step 4: Drawing the Elephant’s Legs
The next step is to add the legs, which will complete the main structure of the elephant’s body.
Instructions for Drawing the Legs:
- Draw Four Simple Rectangles: For each leg, draw a thick, rectangular shape coming out from the bottom of the body. The front two legs should be closer to the head, while the back two should be more toward the back of the body.
- Round the Feet: At the bottom of each leg, round the corners to form the feet. You can add small lines to represent the elephant’s toenails.
This step is important for giving the elephant its sturdy, majestic appearance. Don’t rush—take time to make the legs proportional and well-positioned.
8. Step 5: Adding Details (Ears, Tail, Eyes)
Now, let’s focus on the fun details that bring the elephant to life.
Instructions for Adding Details:
- Draw the Ears: Elephants have large, floppy ears. Draw two large shapes on either side of the head. These can be in the shape of an oversized fan or an irregular rounded shape.
- Draw the Tail: At the back of the body, add a small, thin tail with a tuft at the end.
- Add the Eyes: Draw two large circles on the elephant’s face. Inside each circle, add a smaller circle to represent the eyes’ pupils. You can add a little shine to the eye to make it more lively.
These small touches will bring your elephant to life. Encourage your child to experiment with the shapes of the ears and eyes to make the drawing their own.

Leave a comment